Before finishing my bookshelf, I started another project. Call me crazy but I'm trying to cram everything in before school starts...which is tomorrow.
A few weeks ago at Borders I bought a vintage calendar (not an old calendar but a new 2012 calendar full of vintage prints). I bought it for the sole purpose of making artwork. After thinking about it for two more weeks, I finally had a plan.
Before I give you the step-by-step process, here is the final result...
Pin It
After looking for frames at multiple stores, I came up empty handed. Nothing was the right size or had the 'old' look to match the vintage prints. So, I decided to make my own.
They turned out better than what I envisioned, but it was a long 8 hours of sanding, gluing, drilling, painting, more standing, cutting, gluing, and taping. Then I repeated the entire process again and again (I made a total of three frames).
Other than being time consuming, they were actually pretty simple to make. Here's how.
Before I started, I headed to Home Depot and bought a piece of long, cheap wood (and had it cut to size in the store), L brackets (3 sets of 4), black spray paint, and picture hooks. I already had primer and sandpaper (80 and 150 grit).
Step 1-Sanding
Sand the wood. First with a rougher paper, then a finer one.
Step 2-Assemble
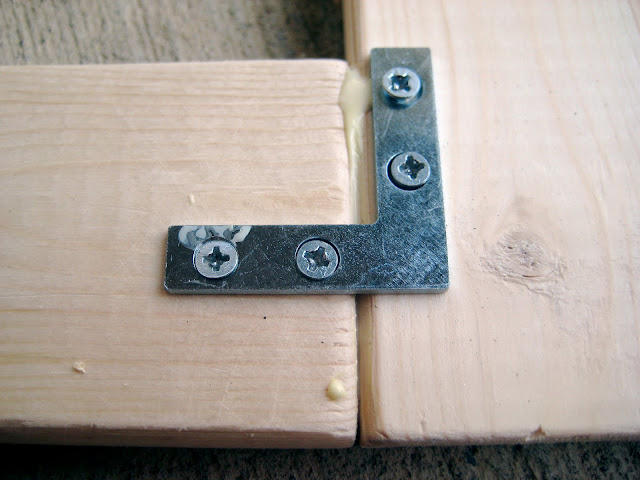
Pre-drill L bracket holes
Reinforce with wood glue
Attach L brackets on all 4 corners
Step 3- Painting & De-stressing
Prime wood with white primer (sorry no picture)
Spray paint wood (I used three very thin coats to avoid drips) allowing 20ish minutes in between coats. The coats were thin and outside in the heat so they dried quickly.
After the paint was dry, I went back with sandpaper to de-stress the frame. I sanded along the edges and corners where it would most likely age naturally.
Step 4 Attaching foam board and picture
I was so eager to finish, I forgot to take photos of the final steps (oops)
I cut a black piece of foam board (from Michaels) into rectangles that were larger than the opening. Using hot glue, I glued the foam board to the back of the frame. After it was dry (10 minutes), I used double-sided permanent tape to tape the picture to the front of the foam board.
Now they are hanging proudly in the kitchen. To get a sense of where they are, when you walk into the kitchen it looks like this...
The oven is on the right and the pictures are right across from the island on the left.
I love the end product and the vibe it adds to the kitchen.


Very Clever! Love it!
ReplyDeleteLooks really great Mollie!! I love this!
ReplyDeleteCute!
ReplyDeleteI am thoroughly impressed! I don't think I could ever take on most of the projects you do! Looks great!!
ReplyDelete