Sock Monkey?
Sock Monkey?
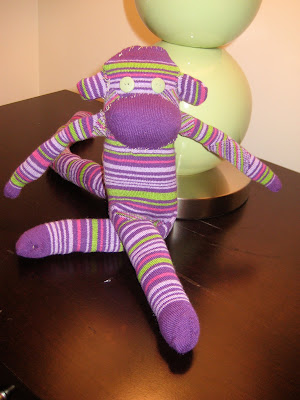
I felt inspired to attempt to make a sock monkey. I found my inspiration after reading about it on Darby's blog (she is a mother of 3 who blogs about daily life, crafts, recipes, etc). This was quite a stretch for me, but I thought what the heck, I'll give it a whirl.
3 things come to mind during this project:
FUN
FRUSTRATING and
FINALLY (I'm done)
Let's start with FUN. This project was fun in itself, just watching the transformation of a pair of socks to a stuffed monkey. It was exciting to see this little monkey slowly take shape from body, to tail, to arms, to mouth, and then finally ears and eyes. I proudly showed my husband each step of the way. Positive feedback helped :) I did get a big sense of accomplishment when the last eye was secure.
However, the FRUSTRATION was evident from first cut to last seam. From numerous (like 15 0r so) sewing machine jams, realizing I cut the wrong end of the sock, sewing part of an ear inside-out, teaching myself how to sew by hand, threading a needle around 20 different times, just to name a few. I screamed frequently and aggressively yanked many knots of out of the machine. I did realize I would encounter some trouble, but after 5.5 hours I was ready to be done.
FINALLY, I proudly introduced to you my first sock monkey...


It is definitely not perfect, but I hope to improve (and be quicker) with the more I make.
I am not an experienced sewer, so I believe anybody with a machine could attempt this project. I used this fabulous, step-by-step tutorial.
Tips
- Use stripped socks ( it helps conceal all the mistakes)
- I ironed some of my seems first, so the sock was flat and easier to sew
- Spread the project over two days
- Day 1-compete torso, and all loose pieces individually
- Day 2-attach all loose pieces to monkey torso (sewn by hand)
- Be patient (it took me 5.5 hours from start to finish)
- Realize your first one will not be perfect


